American Crusting Buttercream Recipe
TMHTB American Crusting Buttercream BAPC Recipe Library · Unit 7: Cakes & Basic Decoration · Lesson 2

Why This Recipe
The American Crusting Buttercream is the professional standard for beginning decorators — and it is the first formula in the curriculum where shortening appears as a deliberate professional choice rather than a substitute for butter. Students who have worked through Units 5, 6, and 7 have seen butter used as a creaming fat, a structural fat, a liquid fat, and a coating fat. In this recipe, butter and shortening are creamed together, and the distinction between them matters: butter contributes flavor and richness but softens at room temperature and loses structure in warm environments; shortening contributes stability, holds piped shapes, and produces the crusting property that allows the surface of the frosting to set after application. This is not a trade-off — it is a professional decision, and students should understand it as such.
This recipe also introduces gel food coloring as a professional standard. Liquid food coloring adds water to the frosting, which changes its consistency and can cause a crusting buttercream to weep. Gel coloring is concentrated, adds no significant liquid, and produces a more saturated color with a fraction of the volume. One small drop of gel produces the color that would require a tablespoon of liquid coloring. Understanding why professional decorators use gel is as important as knowing how to use it.
Professional Learning Objectives
By the end of this lesson, students will be able to:
- Explain the professional function of shortening in a decorator’s buttercream — and why a professional decorator does not use butter alone
- Explain the crusting property and why it matters for piped decoration
- Execute the buttercream: cream butter and shortening first, then gradually add powdered sugar, adjust consistency with liquid
- Explain why gel food coloring is the professional standard — and what liquid coloring does to frosting consistency
- Load a piping bag using the tall cup method
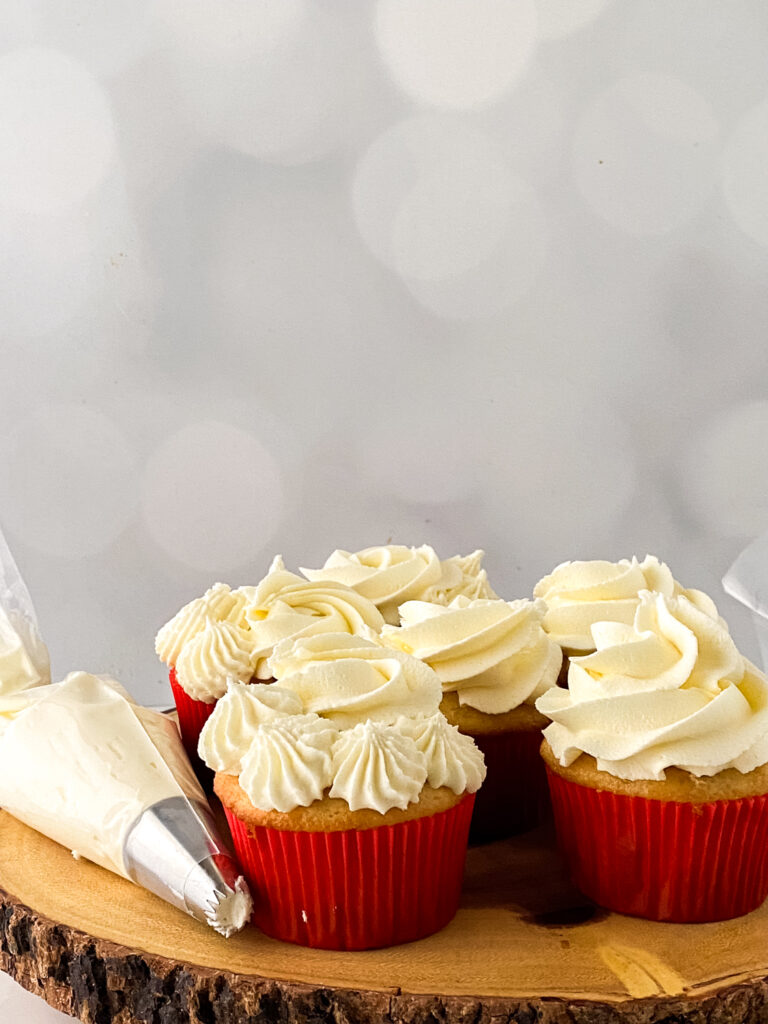
- Execute the 1M/2D rosette on a cupcake: center anchor, circular outward motion, pressure release
- Evaluate a decorated cupcake against the four professional decoration criteria: consistency, coverage, shape definition, and finish
Standards Alignment
Credential Alignment: ACF Certified Fundamentals Pastry Cook · RBA Bakery X · RBA Certified Journey Decorator
Baking & Pastry Skills American buttercream production · Frosting consistency evaluation and adjustment · Gel food coloring technique · Piping bag setup and loading · Pressure control and rosette technique · Professional decoration evaluation
Employability Skills Time management — decorating within a production window · Professional presentation standard · Team accountability · Cleanup to professional standard
STEM & Baking Science Connections Fat selection and stability — shortening vs. butter at room temperature (NGSS PS1.A) · Crusting property — surface crystallization of powdered sugar (NGSS PS1.A) · Gel vs. liquid coloring — concentration and moisture content (NGSS PS1.A)
Professional Vocabulary
American Buttercream · Crusting Buttercream · Shortening · Gel Food Coloring · Piping Bag · Piping Tip · Rosette · Consistency · Pressure Control · Crusting
Equipment
- Stand mixer with paddle attachment (or hand mixer)
- Large mixing bowl
- Rubber spatula
- Measuring cups and spoons
- Tall cup (for loading piping bag)
- Disposable or reusable piping bag
- 1M or 2D piping tip
- Gel food coloring
- Cooled cupcakes from Lesson 1
Teaching Formula
The ingredient list below is formatted for classroom instruction. Each ingredient is listed with its professional function for student annotation during the lesson.
TMHTB American Crusting Buttercream · Yield: approximately 3 cups (enough for 12–16 cupcakes)
| Ingredient | Amount | Professional Function |
|---|---|---|
| Unsalted butter, room temperature | ½ cup (1 stick) | Creaming fat — flavor, richness, aeration through creaming |
| Vegetable shortening | ½ cup | Stability fat — holds structure at room temperature, supports piped shapes, produces crusting property |
| Powdered sugar | 1 pound (approximately 4 cups) | Sweetness, structure, and body — must be added gradually |
| Pure vanilla extract | 1 tsp | Flavor |
| Heavy cream, milk, or coffee creamer | 1–2 tbsp | Consistency adjustment — added gradually until the frosting is smooth and pipeable |
Instructor Prep Notes
- Pull butter from refrigerator at least 60 minutes before class — same room temperature standard as Units 6 and 7 Lesson 1. Cold butter will not cream properly with the shortening.
- Have gel food coloring ready before class begins — demonstrate the difference between one drop of gel and an equivalent amount of liquid color if both are available. The color saturation difference is visible and is an effective lesson opener.
- Test frosting consistency before class: the finished buttercream should hold a peak when the spatula is lifted away but spread smoothly when applied — not stiff, not runny. Adjust with additional liquid one teaspoon at a time.
- Set up a piping bag demonstration station with a tall cup before students arrive.
- Cupcakes from Lesson 1 must be fully cooled before this lesson — residual heat will melt the frosting on contact.
Baking Science Connection
Why Shortening — Not Just Butter
Butter is a water-in-fat emulsion — typically 80% fat, 15–18% water, and 2–5% milk solids. At room temperature, butter has excellent plasticity for creaming, but as the temperature rises above 68–70°F, the fat begins to soften and lose its structural integrity. In a warm kitchen or on a warm cupcake, a butter-only buttercream can soften, weep, and lose its piped shape within minutes of application.
Shortening is 100% fat with no water content. It is more stable at a wider range of temperatures, and it produces the crusting property that defines this buttercream: as the frosting sits at room temperature, the powdered sugar on the surface begins to crystallize slightly, forming a thin, dry outer layer that protects the piped shape from smudging and deformation. A butter-only buttercream does not crust — it stays soft and is more vulnerable to handling. The shortening is not a cheaper substitute. It is a professional decorator’s choice.
Why Gel Food Coloring
Food coloring is available in liquid and gel form. Liquid coloring is diluted in water — it takes a large volume to achieve a saturated color, and that volume of water changes the frosting’s consistency. Added to a crusting buttercream, liquid coloring adds enough moisture to interfere with the crusting property and can cause the frosting to weep or soften. Gel coloring is a concentrated paste or gel — one small drop carries the same colorant as a tablespoon of liquid coloring. It adds negligible moisture, it does not change the frosting’s consistency, and it produces more vivid, saturated colors. The professional standard is gel coloring for buttercream decoration.
Powdered Sugar and Gradual Incorporation
Powdered sugar (confectioners’ sugar) is granulated sugar ground to a fine powder and blended with a small amount of cornstarch to prevent caking. In a buttercream, it provides both sweetness and structure — the fine particles integrate into the fat matrix and give the frosting its body. Adding powdered sugar all at once overwhelms the fat matrix, produces an uneven texture, and releases a cloud of fine powder. Gradual incorporation — adding the sugar while the mixer runs on low, allowing each addition to be absorbed before the next — protects the fat structure and produces a smooth, consistent frosting.
Safety and Sanitation Standards
- Wash hands before handling any frosting ingredients or cupcakes
- Cupcakes must be confirmed fully cooled before frosting — ServSafe temperature awareness
- Piping bags and tips must be washed, rinsed, and sanitized after use if reusable; disposable bags discarded
- All equipment washed, rinsed, and sanitized at end of production
Production Method
Making the Buttercream
- Place room temperature butter and shortening in the mixer bowl. Cream together on medium speed until smooth and fluffy — about 2–3 minutes. The mixture should look uniform and pale.
- With the mixer on low, begin adding powdered sugar gradually. Add approximately one cup at a time, allowing each addition to incorporate before adding the next.
- Add vanilla extract and 1 tablespoon of liquid (heavy cream, milk, or coffee creamer). Mix on low until combined.
- Increase speed to medium and mix until smooth. If the frosting is too stiff, add liquid one teaspoon at a time until the desired consistency is reached. If too soft, add a small amount of additional powdered sugar.
- Increase speed to high and beat for 3–5 minutes until the frosting is light, fluffy, and holds a soft peak when the spatula is lifted.
- To color: add one small drop of gel food coloring. Mix on low until evenly distributed. Add additional drops only if a deeper color is desired — start with less than you think you need.
- Check consistency: the frosting should hold its shape when scooped with a spatula but spread smoothly. It should feel soft and creamy, not stiff or grainy.
Loading the Piping Bag
- Place a tall cup on your workstation. Drop the piping tip (1M or 2D) into the bag and push it fully through to the bottom opening — it should be fully seated with no gap between the tip and the bag.
- Fold the top of the bag over the rim of the cup to create a cuffed opening. This holds the bag open while you fill it.
- Fill the bag halfway with buttercream — no more. Overfilling reduces control and makes the bag difficult to hold.
- Uncuff the bag and twist the top closed, pushing the buttercream toward the tip. Hold the twist firmly between your thumb and forefinger — this is your pressure control.
Piping the Rosette
- Hold the piping bag perpendicular to the cupcake surface — straight up and down, not at an angle. Position the tip directly over the center of the cupcake, approximately ½ inch above the surface.
- Apply firm, even pressure and pipe a small star directly in the center. This is the anchor.
- Without releasing pressure, lift the tip very slightly and begin moving in a tight circular motion outward around the center star — one complete circle.
- Release pressure completely and pull the tip away to the side. Do not lift straight up — pulling to the side prevents a peak from forming at the tip.
- Add sprinkles or any finishing decoration immediately, while the frosting is still fresh and receptive.
Chef Instructor Notes
The most common beginner mistake in piping is inconsistent pressure — squeezing too hard at the start and losing control, or squeezing too softly and losing definition in the rosette. Before students pipe on a cupcake, have them practice the motion on a flat surface or a piece of parchment — one practice rosette before touching the cupcake. The tall cup loading method is not optional for beginners: without it, filling a piping bag is genuinely messy and students will overfill and lose control of the bag. Enforce the halfway rule. Also: if the frosting is too stiff it will not release cleanly from the tip and the rosette will look choppy. If it is too soft the rosette will not hold its shape. Consistency check before piping begins saves the class.
Professional Quality Criteria — Decoration
Students evaluate their decorated cupcakes against these professional decoration standards:
- Consistency: Frosting is smooth with no lumps or graininess — evidence of correct powdered sugar incorporation
- Coverage: Rosette covers the cupcake surface from edge to edge — no bare cupcake visible under or around the rosette
- Shape Definition: The circular swirl is visible and defined — center anchor clear, outward circular motion distinguishable
- Finish: Clean tip release — no peak or drag mark at the end of the rosette; sprinkles or finish decoration evenly distributed
Teacher Timing Guide
| Activity | Estimated Time |
|---|---|
| Introduction — shortening science, gel coloring, piping bag overview | 10 minutes |
| Buttercream Production | 12 minutes |
| Coloring and Consistency Check | 5 minutes |
| Piping Bag Loading Demonstration | 5 minutes |
| Student Practice + Cupcake Decoration | 15 minutes |
| Evaluation and Reflection | 8 minutes |
Troubleshooting
| Problem | Most Likely Cause | Correction |
|---|---|---|
| Frosting is grainy | Powdered sugar added too fast | Slow down addition; beat on high longer |
| Frosting is too stiff to pipe | Not enough liquid | Add liquid one teaspoon at a time |
| Frosting is too soft, loses shape | Too much liquid or butter too warm | Add powdered sugar; chill briefly in refrigerator |
| Rosette has no definition | Frosting too soft, or pressure inconsistent | Check consistency; practice pressure control on parchment first |
| Peak at end of rosette | Tip lifted straight up rather than pulled to side | Release pressure and pull tip to the side, not up |
| Color uneven | Gel not fully mixed | Continue mixing on low until color is uniform |
Reflection Questions
- What is the crusting property — and why does shortening produce it when butter alone does not? Use the baking science of fat and temperature to explain.
- Why is gel food coloring the professional standard for buttercream decoration? What would happen to the frosting consistency if liquid food coloring were used instead?
- Look at your finished decorated cupcake against the four decoration criteria. Which criterion was most completely met — and which would you improve in the next batch? For the one you would improve, state the exact technique decision you would change.
- The frosting uses the creaming method — the same method as the cookie and bar from Unit 6. What is the same about how the frosting is made — and what is different about what it is used for?
Storage
- Store buttercream in an airtight container at room temperature for up to 3 days, or refrigerated for up to 2 weeks
- Before using refrigerated buttercream, bring to room temperature and re-beat until fluffy — the texture will restore
- Freeze buttercream for up to 3 months in an airtight container — thaw overnight in the refrigerator, then bring to room temperature and re-beat
- Frosted cupcakes: store in an airtight container in the refrigerator for up to 5 days — bring to room temperature before serving

American Crusting Buttercream
Ingredients
Equipment
Method
- Cream butter and shortening together.
- Add powdered sugar, vanilla and 1 tbsp liquid to bowl.
- Mix until incorporated.
- Add an additional tbsp of liquid.
- Mix on high for 3-5 mins.
- Only add the last .05 tbsp of liquid if it’s not silky and a smooth.