How to make Conversation Hearts cookies
Conversation Hearts Tutorial: A Step-by-Step Guide to Decorating Heart-Shaped Sugar Cookies
If you’re looking to create a sweet and personalized touch for your Valentine’s Day celebrations (or any occasion!), this Conversation Hearts Tutorial will guide you through decorating sugar cookies with royal icing in pastel colors. Whether you’re a seasoned baker or just getting started, this tutorial will help you master the art of writing sweet messages on your cookies.
Equipment You’ll Need
- Piping Bags
- Pair of Scissors
- Royal Icing
- Heart-shaped Sugar Cookies
- Wilton Edible Markers
- Gel Food Colors
- Toothpick or Skewer

Step-by-Step Instructions
Step 1: Color the Royal Icing
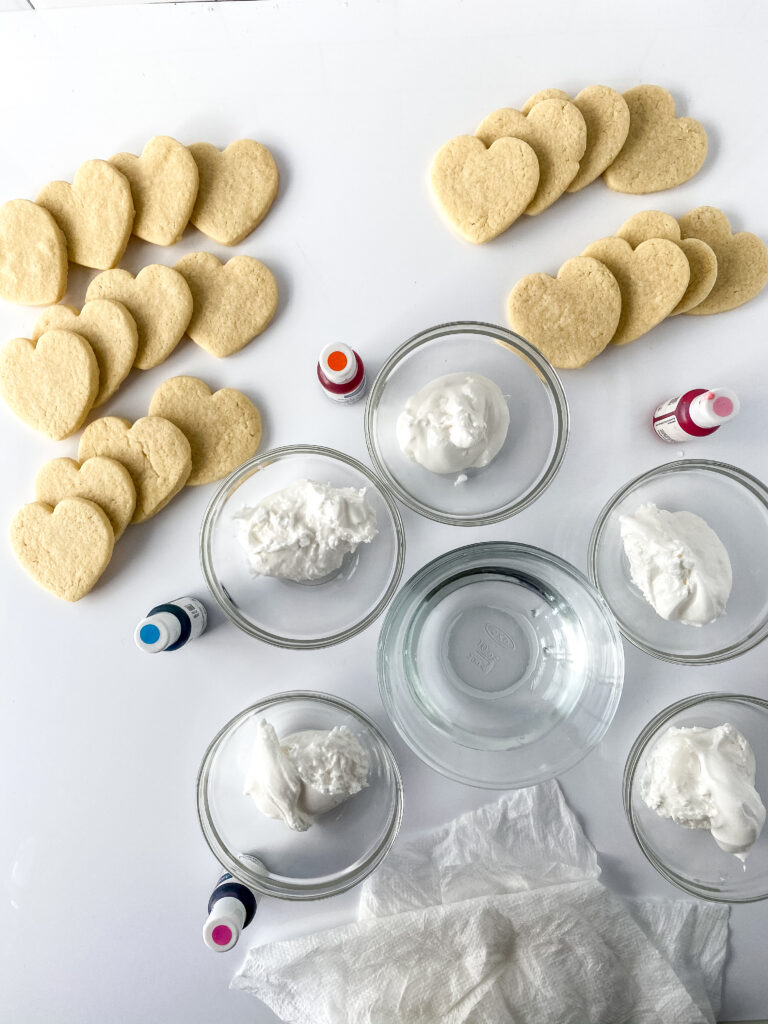
Start by coloring your royal icing. You can use as many colors as you’d like, but for a classic pastel look, we suggest using pink, orange, green, blue, and yellow.
- Tip: To achieve pastel shades, you will need to add white gel food coloring after dyeing your icing to lighten the color.
Step 2: Prepare the Piping Bags
Fill each piping bag with a different color of royal icing. Once filled, seal the open end tightly to avoid any leakage.
- Tip: Cut a small hole at the tip of each bag to test the flow of the icing. If the icing flows smoothly and doesn’t hurt your hands, you’re ready to go. If the hole is too large, simply cut it a bit smaller. If you cut too much off, you’ll have to start with a new bag.
Step 3: Outline the Cookie
Once your piping bags are prepared, start by outlining the edges of the heart-shaped cookie with royal icing. Apply gentle pressure to the piping bag to form a clean outline along the edges of each cookie.
Step 4: Fill in the Center
With a bit more pressure, add icing to the center of the cookie, filling it in completely. You can use a toothpick or skewer to carefully move the icing around and smooth it out, ensuring there are no gaps.
Step 5: Let the Icing Dry
Allow the decorated cookies to set for at least an hour to ensure the icing hardens before adding any further details.
Important Notes Before You Start

Coloring the Royal Icing:
- Pastel Shades: To get a pastel color, start by adding your base color and then mix in white gel food coloring until you reach the desired shade.
- Gel vs Liquid Food Coloring: Use gel food coloring instead of liquid food coloring. Liquid colors can alter the consistency of your icing, leading to runny designs. Gel food colors will keep the icing firm and manageable.
Royal Icing Guidelines:
- Consistency of Royal Icing: Royal icing should neither be too stiff nor too loose. To test the consistency, slide a spoon through the center of the icing. Count how long it takes for the line to disappear. You want the icing to take 13-15 seconds to disappear. If it disappears too quickly, your icing is too loose. If it doesn’t close at all, it’s too stiff.
- Fixing Runny Icing: If your icing is too loose, add more stiff royal icing or sifted powdered sugar to thicken it up.
- Working with Royal Icing: When you’re not using royal icing, always keep it covered with a damp paper towel to prevent it from drying out.
How to Fill Your Piping Bags Efficiently:
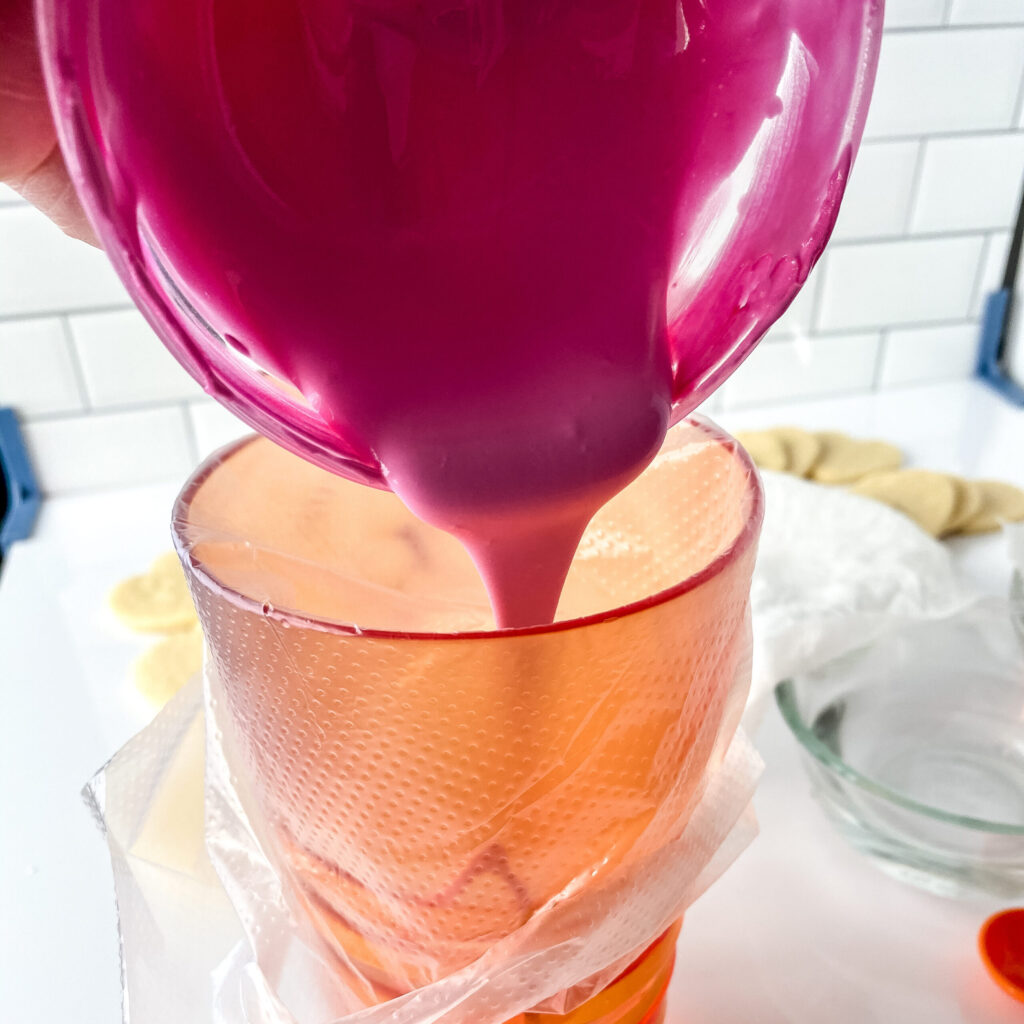
- Use a tall cup to hold your piping bag in place. Flatten the tip of the bag downward on the cup, then scoop or pour the icing into the bag.
- Avoid getting icing on the outside of the bag, and once filled, lift the cup to remove any air trapped inside the bag.
- Seal the bag tightly with a knot, bag ties, or a rubber band to ensure the icing doesn’t spill out of the wrong end.
Additional Tips for Success:
- Practice First: Before you start decorating all your cookies, practice writing and decorating on a piece of parchment paper or a test cookie to get comfortable with the flow of the icing.
- Get Creative with Messages: Use Wilton edible markers to add messages like “Love,” “Kiss Me,” or “Be Mine” to each heart, just like you’d see on store-bought conversation hearts.
- Decorate in Layers: If you want to add different designs or borders, allow each layer to dry before adding the next. This will ensure the designs don’t bleed into one another.
Last piece of advice
Decorating heart-shaped sugar cookies with royal icing is a fun and creative way to celebrate any occasion! These Conversation Hearts are a perfect treat for Valentine’s Day or as personalized gifts. Follow this step-by-step guide to master the technique and create beautiful, edible art that will delight anyone who receives it.
Looking for more fun decorating tips and tutorials? Be sure to check out our other dessert guides and join us for more creative baking adventures!
Pin For Later

Take my on Demand Cookie Decorating Class:


Equipment
Method
- Color royal icing as many colors as you would like, we chose pink, orange, green, blue, and yellow.
- Remember to lighten up the color to a pastel, you will need to add white gel food coloring.
- Fill each of the piping bags with their respective colors and seal off the open end.
- Cut the tip slightly and test how the icing flows out the bag. Remember to cut a small hole in the tip
- first, then gradually make it larger. If you cut too much off at once, you will have to create a new bag.
- Once you have a flow of icing that does not hurt your hands and is easily managed, outline the cookie with icing.
- With a little more pressure add icing to the center of the cookie. Use a toothpick or skewer to move the icing around on the cookie.
Notes
Gel Vs Liquid Food Coloring:Water-based or liquid food coloring will change the consistency of your icing when working with them.
As an industry standard when working on decorated cookies, gel or powder colors are preferred.
Royal Icing Guidelines:Royal icing dries hard when uncovered. During the non-mixing moments and coloring, you should keep a wet paper towel over the royal icing until it is inside of the piping bag.Royal Icing should not be too stiff, nor too loose. Make sure you follow the directions on the royal icing mix and do an icing consistency test:
To test your royal icing:Slide the spoon down the center of the bowl, touching the bottom. Count how long it takes the line to disappear from the icing. You want it to take 13-15 seconds. If the icing closes immediately your icing is too loose and will run off the cookie.If the icing is too loose, add more of the stiff royal icing or add SIFTED powdered sugar to thicken it up. The powdered or icing sugar must be sifted to minimize the risk of clumps in the icing coming out of the piping bags. How to easily and quickly fill your piping bags: Using a tall cup, place the piping bag inside of the cup, making sure you flatten the tip of the bag downward on the cup. Scoop or pour the icing into the bag making sure not to get icing on the overhang of the piping bag on the outside of the cup. Lift the side of the cup straight up, press out any ai,r and tie the bags in a knot, with bag ties, or seal them with a rubber band or something similar, to keep the icing from coming out the incorrect end of the bag.