How to Blind Bake a Pie Crust (Without Shrinking or Soggy Bottoms)
There is nothing quite as disappointing as cutting into a beautiful homemade pie only to discover that the bottom crust is pale, soft, or downright soggy. You spent time preparing the dough, rolling it out, and carefully fitting it into your pie dish, but somehow the crust didn’t bake the way you expected.
Here’s something I teach my baking students: a great pie starts with understanding what the crust needs before you add the filling.
Sometimes that means baking the crust on its own first. This technique is called blind baking, and it’s one of those foundational pastry skills that can make a noticeable difference in your finished pies. Whether you’re preparing a chocolate cream pie, a homemade quiche, or a pumpkin pie for the holidays, learning how to blind bake a pie crust will help you achieve a better texture, a more stable shell, and a beautifully baked bottom.
Let’s talk about how it works, when to use it, and what to do when your pie crust doesn’t cooperate.

What Does It Mean to Blind Bake a Pie Crust?
Blind baking simply means baking a pie crust before adding its filling. Depending on the type of pie you’re making, you may bake the crust partially or all the way through. When you bake a fruit pie, the crust and filling usually go into the oven together. The filling releases moisture while the pastry bakes, and the recipe is designed to accommodate that process.
But not every filling behaves the same way.
Some fillings, such as chocolate pastry cream or a refrigerated cream filling, don’t require any additional baking. Others, including certain custards and quiches, need oven time, but not necessarily enough to fully cook the raw pastry underneath.
That’s where blind baking comes in. By giving the crust a head start, you’re allowing the pastry to develop its structure before it comes into contact with a wet filling. And that makes a difference.
When Should You Blind Bake a Pie Crust?
Before you begin, determine whether your recipe needs a partially baked crust or a fully baked one. These are two different approaches, and choosing the correct one is important.
| Type of pie | Blind baking method | Why |
|---|---|---|
| Chocolate cream pie | Fully baked | The filling doesn’t need to bake in the crust |
| Banana cream pie | Fully baked | The pastry must be completely cooked before filling |
| Lemon meringue pie | Usually fully baked | Many versions use a cooked lemon filling |
| Pumpkin pie | Partially baked, when specified | Helps reduce the risk of a soggy bottom |
| Quiche | Usually partially baked | Gives the crust a head start before adding the custard |
| Pecan pie | Recipe-dependent | Some recipes benefit from partial baking |
| Traditional double-crust apple pie | Usually not blind baked | The top and bottom crusts typically bake with the filling |
Chef Kim’s teaching tip: Don’t assume every pie needs blind baking. Start with the filling and ask yourself how much oven time it requires. That will help you determine what the crust needs.
What You’ll Need to Blind Bake a Pie Crust
You don’t need a collection of specialty baking tools to master this technique. A few basic items will help you achieve consistent results.
Ingredients
- One unbaked pie crust, homemade or store-bought, sized for a 9-inch pie dish
- A small amount of all-purpose flour for rolling, if needed
Equipment
- 9-inch pie dish
- Rolling pin, if using homemade dough
- Parchment paper or oven-safe foil
- Pie weights, dried beans, or uncooked rice
- Baking sheet
- Fork
- Cooling rack
A note about pie weights: You’ll need enough weights to fill the lined crust well up the sides, not just cover the bottom. Supporting the sides is especially important for preventing the dough from slumping while it bakes.
Dried beans or uncooked rice can work as substitutes, but keep them reserved for future blind baking rather than ordinary cooking.
How to Blind Bake a Pie Crust Step by Step
For this tutorial, we’re using a conventional oven preheated to 375°F (190°C) and a standard 9-inch pie dish.
The baking times below are starting points. Your exact timing will depend on the thickness of your dough, the material of your pie dish, and how your oven heats. I’ll explain the visual cues you should watch for along the way.
Step 1: Prepare and Rest Your Pie Dough
If you’re making homemade pie dough, prepare it according to your recipe and refrigerate it before rolling.
I recommend allowing the dough to rest in the refrigerator for at least two hours, or for the amount of time specified in your recipe.
Why does this matter?
When you mix and roll pie dough, you’re working the gluten in the flour. Gluten gives pastry structure, but too much development or tension can make the dough difficult to handle and contribute to shrinking during baking.
Resting gives the dough time to relax while the butter firms up again.
You want the dough cold enough to handle without becoming sticky, but still flexible enough to roll without cracking.
Step 2: Roll Out the Dough Evenly
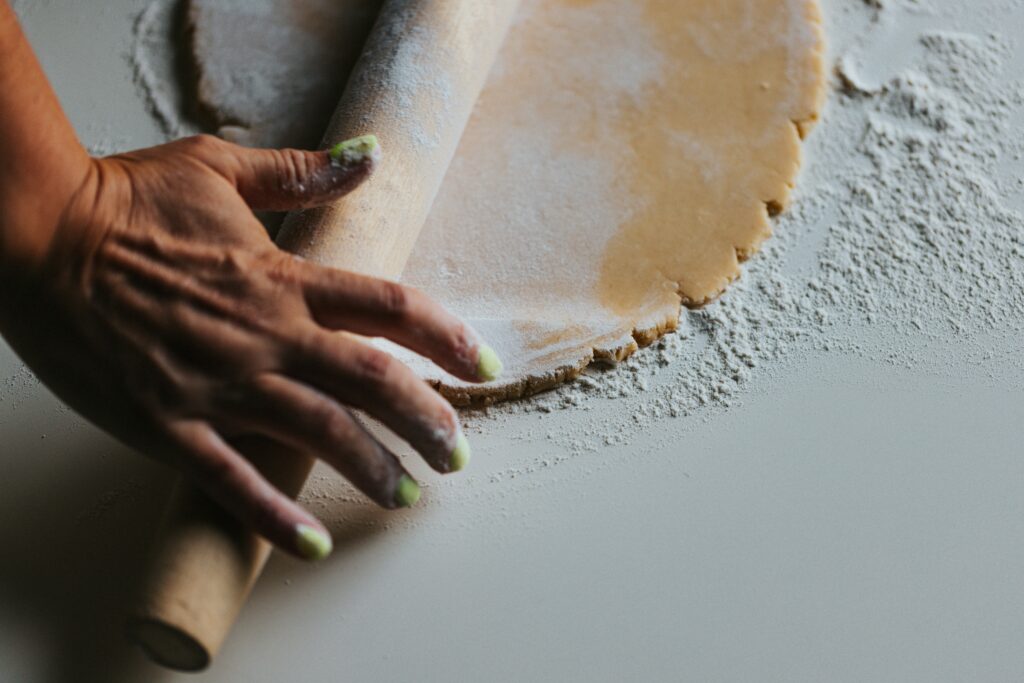
Lightly flour your work surface and rolling pin. Place your chilled dough in the center and begin rolling from the middle outward.
For a standard 9-inch pie dish, you’ll generally need a circle approximately 12 inches in diameter, although deeper dishes may require more.
Aim for an even thickness of approximately 1/8 inch.
As you roll, turn the dough occasionally to prevent sticking and help maintain a circular shape.
One mistake I see bakers make is rolling the center thin while leaving the edges noticeably thicker. This creates uneven baking, and the thinner areas may brown before the thicker sections have finished cooking.
Consistency matters more than achieving a perfectly round circle.
Step 3: Fit the Dough Into the Pie Dish
Carefully lift the rolled dough and transfer it to your pie dish.
Rather than pulling the dough across the dish, gently lower it into the bottom and corners. Use your fingers to help it settle naturally against the surface.
Never stretch pie dough to make it fit.
Stretched dough has a tendency to pull back as it bakes, which can cause the sides to shrink or collapse.
Leave enough overhang to create your desired edge. Trim any excess dough, then fold and crimp the rim.
If you prefer a decorative edge, now is the time to create it.
Your goal is a well-fitted pastry shell with even thickness and no tension pulling against the sides of the dish.
Step 4: Chill the Shaped Pie Crust
Once the dough is fitted into the pie dish, place it in the refrigerator for at least 30 minutes.
This second chilling period is just as important as the first.
Remember, you’ve just rolled, transferred, and shaped the dough. Chilling allows it to relax again while the butter firms up.
Cold butter helps the pastry maintain its structure during the early stages of baking. As the butter melts and water turns to steam, it contributes to the flaky texture we want in a well-made pie crust.
If your dough feels especially soft or your kitchen is warm, additional chilling may be helpful.
Step 5: Preheat the Oven
While the crust chills, preheat your oven to 375°F (190°C).
Allow the oven to fully reach temperature before baking.
Place an oven rack in the lower third of the oven. This position can help the bottom crust receive more heat, although you’ll still want to follow any specific instructions provided with your pie dough recipe.
I also recommend placing the pie dish on a baking sheet. It makes transferring the crust easier and helps catch any butter that may escape during baking.
Step 6: Line the Crust and Add Pie Weights
Remove the chilled pie crust from the refrigerator.
Take a sheet of parchment paper large enough to cover the bottom and extend above the sides of the pie dish.
Here’s a little kitchen trick: crumple the parchment into a loose ball, then open it again. The wrinkles make it easier to fit the paper against the curves of the dish.
Gently press the parchment into the crust, making sure it reaches the bottom corners.
Next, fill the lined crust with pie weights, dried beans, or uncooked rice.
Don’t stop after covering the bottom.
You want the weights to support the sides of the pastry as well. Without that support, the dough can puff, slide, or collapse before its structure has set.
Step 7: Bake the Crust With the Weights
Place the prepared crust in the preheated oven.
Bake for approximately 15–20 minutes, checking for the first signs that the edges are setting and beginning to develop color.
The exact time may be longer for a deep pie dish or a thicker crust.
At this stage, the weights are holding the pastry in place while the dough begins to firm up.
You’re not necessarily trying to achieve a completely golden crust yet. You’re creating the structure that will allow the shell to finish baking without losing its shape.
Once the edges appear set and the pastry is beginning to look dry rather than raw, carefully remove the pie from the oven.
Lift out the parchment and weights. Be cautious because they will be very hot.
Step 8: Finish Baking Without the Weights
Now it’s time to decide whether you’re partially baking or fully baking the crust.
Once the weights are removed, examine the bottom. It will often look pale and slightly moist because the parchment and weights have protected it from direct oven heat.
If you notice any large bubbles forming, gently prick those areas with a fork to release trapped air. Avoid making unnecessary holes throughout the crust, particularly if you’ll be adding a liquid filling.
Return the crust to the oven.
For a partially baked pie crust: Continue baking for approximately 5–10 minutes, or until the bottom looks dry and the pastry is beginning to develop a little color. The crust will finish baking after you add the filling.
For a fully baked pie crust: Continue baking for approximately 10–20 minutes, or until the bottom and sides are golden brown and the pastry appears completely cooked.
These are approximate ranges, not guarantees. The color and texture of the pastry should determine when you remove it from the oven.
If the edges are browning faster than the bottom, protect them with a pie shield or strips of foil while the base continues baking.
For fillings that don’t require baking, allow the finished crust to cool completely before adding the filling.
How Do You Know When a Blind-Baked Pie Crust Is Done?
This is one of the most important skills you can develop as a baker.
Recipes provide times and temperatures, but your eyes tell you what is actually happening inside the oven.
A properly blind-baked crust should have the appearance appropriate for its intended use.
| What you’re looking for | Partially baked crust | Fully baked crust |
|---|---|---|
| Bottom | Dry and set, with little color | Golden brown and completely baked |
| Sides | Firm enough to hold their shape | Firm and golden |
| Texture | Set but still needs additional baking | Crisp and ready for filling |
| Next step | Add a filling that will be baked | Cool before adding a no-bake filling |
If the bottom still looks wet, shiny, or translucent, it needs more time.
And here’s something worth remembering: a beautifully browned rim doesn’t automatically mean the bottom is finished.
Look at the entire crust.
Why Does My Pie Crust Shrink During Blind Baking?
Shrinking is one of the most common problems bakers experience with pie dough.
You carefully crimp the edges, place the crust in the oven, and return a few minutes later to find the sides pulling down into the dish.
Frustrating? Absolutely. But there’s usually a reason.
You stretched the dough while fitting it into the dish
When dough is stretched, it naturally wants to contract.
Instead of pulling it to fit the corners, gently lower the pastry into place and allow enough dough to cover the dish without tension.
The dough didn’t rest long enough
Rolling and shaping develop tension in the dough. Refrigeration gives the gluten time to relax.
If you’re consistently experiencing shrinkage, review your resting and chilling periods before changing your recipe.
You didn’t use enough pie weights
A handful of weights sitting on the bottom of the crust won’t provide much support for the sides.
Fill the lined crust well enough to support the pastry as it begins to bake.
The dough was overworked
Overmixing or repeatedly rerolling pie dough can develop too much gluten.
Handle the dough only as much as necessary, and give it time to rest when it becomes elastic or difficult to roll.
Chef Kim’s troubleshooting tip: When a pie crust shrinks, don’t immediately blame the recipe. Examine your handling technique first. Often, the difference between a shrinking crust and one that holds its shape comes down to resting, chilling, and proper support.
How to Prevent a Soggy Pie Crust
Let’s talk about the bottom of the pie.
A crust can look beautiful from above and still be underbaked underneath. This is particularly common when the filling contains a significant amount of moisture.
Here are a few ways to improve your results.
Bake until the bottom is actually set
Removing the weights is not the end of blind baking.
The bottom of the crust needs additional oven time after the weights come out. Otherwise, you may end up placing a wet filling directly onto undercooked pastry.
Use the right pie dish
The material of your pie dish affects how heat reaches the crust.
Metal pie pans generally transfer heat efficiently and can promote browning. Glass dishes allow you to see the bottom, which is helpful when you’re learning to judge doneness. Ceramic dishes retain heat well but may require adjustments to baking time.
None of these materials is automatically wrong. The important thing is understanding how your equipment behaves.
Consider an egg wash for certain fillings
For some recipes, a thin layer of beaten egg or egg white brushed onto a partially baked crust can help create a barrier between the pastry and a moist filling.
The egg wash should be applied according to the pie recipe, usually near the end of prebaking so it can set briefly in the oven.
This isn’t necessary for every pie, but it can be a useful technique when working with especially moist fillings.
Don’t fill a crust before it’s ready
For a no-bake filling, the crust should be fully baked and completely cooled.
Adding a cold filling to warm pastry can create condensation and soften the crust.
Patience makes a difference here.
Common Blind Baking Problems and How to Fix Them
| Problem | Likely cause | What to do next time |
|---|---|---|
| Crust shrinks down the sides | Dough stretched, insufficient chilling, or inadequate weights | Fit without stretching, chill thoroughly, and support the sides |
| Bottom puffs up | Trapped steam or insufficient weights | Use enough weights and prick large bubbles after removing them |
| Bottom stays pale | Not enough baking time without weights | Continue baking until the bottom reaches the desired color |
| Edges get too dark | Edges bake faster than the base | Cover the rim with a pie shield or foil |
| Crust becomes tough | Too much mixing, rerolling, or handling | Handle gently and rest the dough |
| Crust breaks when removing weights | Pastry hasn’t set sufficiently or parchment is pulled too quickly | Allow the shell to set and lift the weights carefully |
| Finished crust becomes soggy | Underbaking, wet filling, or filling before cooling | Fully bake when appropriate and cool before filling |
Can You Blind Bake a Store-Bought Pie Crust?
Absolutely.
Blind baking isn’t limited to homemade pastry. Refrigerated or frozen pie dough can also benefit from prebaking, depending on the filling.
The important thing is to check the package instructions first.
Some prepared pie crusts have specific temperature recommendations, and certain frozen shells are designed to be baked directly from frozen.
If the manufacturer provides blind baking instructions, follow those recommendations rather than automatically using the timing for homemade dough.
The same principles still apply: support the pastry, watch for shrinkage, and bake the bottom to the appropriate stage before adding the filling.
Can You Blind Bake a Pie Crust Without Pie Weights?
Yes, but you’ll need something to help hold the pastry in place.
Dried beans and uncooked rice are common alternatives. Line the crust with parchment or oven-safe foil before adding either one.
Make sure the weights reach the sides of the crust so they provide support while the dough sets.
I don’t recommend skipping weights entirely when you’re learning to blind bake a traditional pastry crust. Without them, the bottom may puff up and the sides may slide down, especially if the dough becomes warm before its structure has set.
How to Make a Blind-Baked Pie Crust Ahead of Time
Blind baking is a useful technique when you’re preparing desserts for holidays, special events, or large gatherings.
Refrigerating unbaked pie dough
Homemade pie dough can often be refrigerated for approximately two to three days when wrapped tightly, depending on the recipe.
You can also shape the dough in the pie dish and refrigerate it until you’re ready to bake, provided it’s well covered.
Freezing pie dough
For longer storage, wrap the dough securely and freeze it for up to approximately three months for best quality.
You can freeze a disk of dough or a shaped pastry shell, depending on your preferred workflow.
Storing a fully baked crust
A completely baked, unfilled pie crust can generally be kept tightly covered at room temperature for about one to two days, provided it contains no perishable additions.
For longer storage, freeze the cooled crust in a protective container or wrapping to reduce breakage and freezer odors.
Once you’ve added a filling, follow the storage requirements for that particular pie. Custard, cream, and other perishable fillings require refrigeration.
Frequently Asked Questions About Blind Baking
Do I need to poke holes in my pie crust before blind baking?
Not necessarily. When using parchment and sufficient pie weights, the weights help prevent the bottom from puffing up. After removing them, you can gently prick any large bubbles that appear. Avoid excessive holes when working with a liquid filling because the filling may seep through.
What temperature should I use to blind bake a pie crust?
This tutorial uses 375°F (190°C), but some recipes call for higher temperatures. The correct temperature depends on your dough, pie dish, and desired result. Follow your specific pastry recipe when it provides different instructions.
Why is my blind-baked crust still soggy?
The most likely explanation is that the bottom didn’t bake long enough after the weights werThe most likely explanation is that the bottom didn’t bake long enough after the weights were removed. It can also happen when a moist filling is added to an underbaked shell or when a no-bake filling is placed into a crust before it has cooled.
Can I blind bake a pie crust the day before?
Yes. A fully baked, unfilled crust can usually be prepared the day before serving. Allow it to cool completely, then cover it carefully to preserve its texture.
Do I need to blind bake a crust for pumpkin pie?
It depends on the recipe. Some pumpkin pies are designed to bake in an unbaked shell, while others benefit from partial blind baking. Follow the instructions for your specific filling and crust combination.
What’s the difference between blind baking and par-baking?
Blind baking is the general technique of baking a crust before adding its filling. Par-baking, or partial baking, is one form of blind baking in which the crust is only baked partway before the filling is added and the pie returns to the oven.
Can I reuse dried beans or rice after blind baking?
Yes, you can generally reuse them as baking weights once they’ve cooled and are stored in a dry container. However, reserve them for blind baking rather than cooking them as food.
Pies that will please everyone
- Easy Peach Galette with Buttery Flaky Crust
- How to Make the Easiest Lattice Pie Crust
- How to make a Maple Pecan Sweet Potato Pie
- How to make my Grandmama’s Sweet Potato Pie
- How to make Sweet Potato Cheesecake Brownies
The Skill That Makes Better Pies Possible
The more you bake, the more you realize that successful pastry isn’t about memorizing a collection of recipes. It’s about understanding what your ingredients are doing and recognizing the small decisions that influence your results. Blind baking is a perfect example.
The temperature of your dough matters. The way you fit it into the dish matters. Even how high you fill the crust with pie weights can influence whether your finished pastry holds its shape. Once you understand those details, you can approach your next pie with a lot more confidence. And that’s the real goal: not simply following instructions, but developing the skills to recognize what good pastry looks and feels like at every stage.
Ready to build more confidence in the kitchen? Explore the free Teach Me How to Bake™ beginner baking masterclass and continue building the foundational techniques that help you bake with consistency.
PIN for Later
