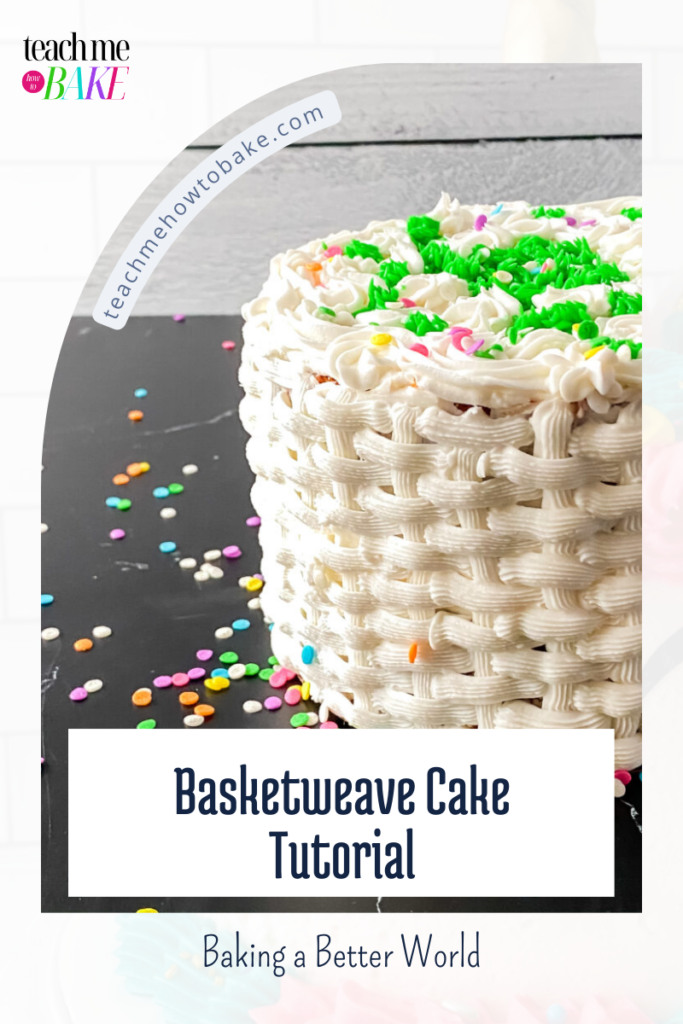
How to Make a Basket Weaved Cake: A Step-by-Step Tutorial
Creating a basket-weaved cake is a fun and intricate decorating technique that will wow your guests at any event. Whether you’re preparing for Easter, Mother’s Day, birthdays, or baby showers, this detailed basket weave design can be customized to your liking, making it the perfect cake for a variety of occasions. This tutorial will guide you through the steps to create the beautifully woven pattern using buttercream icing. Let’s dive in!
Items You’ll Need:
- Turntable: Amazon.com | Ateco Revolving Cake Decorating Stand, Plastic Turntable and Base, 11-Inch Round, White
- Piping Bags: Amazon.com | Wilton 12-Inch Disposable Cake Decorating Pastry Bags, 50-Count
- Coupler: Amazon.com | Wilton Coupler Set, STD, White
- Tip 47: Amazon.com | Wilton W418SET-47233 Basketweave and No.233 Multi-Opening Decorating Tip Set
- Prebaked Cake (preferably frozen)
- Buttercream Icing (store-bought or homemade)
- Offset Spatula
- Cake Board: The same size as your cake or a Cake Drum 2 inches larger than the size of your cake.
Important Notes:
This intricate basketweave design is perfect for special occasions like Easter, Mother’s Day, birthdays, baby showers, or any holiday celebration. You can adjust the tightness of the weave based on your preference—whether you want it tight and compact or looser for a more relaxed look.
- Cake and Icing Options: You can either bake your cake from scratch or buy a frozen, uniced cake from the grocery store bakery. Make sure to use a thick buttercream icing that will hold the design. Avoid the pre-packaged icing from the cake aisle as it’s often too thin to hold the pattern properly.
- Buttercream Icing: Homemade or premade buttercream is preferred. Here are some Amazon options:
- Cake Boards vs. Cake Drums: Cake boards are lightweight and used for placing layers together or for cake stands. Cake drums are sturdier, with several cake boards glued together and covered in decorative food-safe foil. Cake drums are perfect for presentation purposes.
Step-by-Step Instructions:
Prepare the Cake
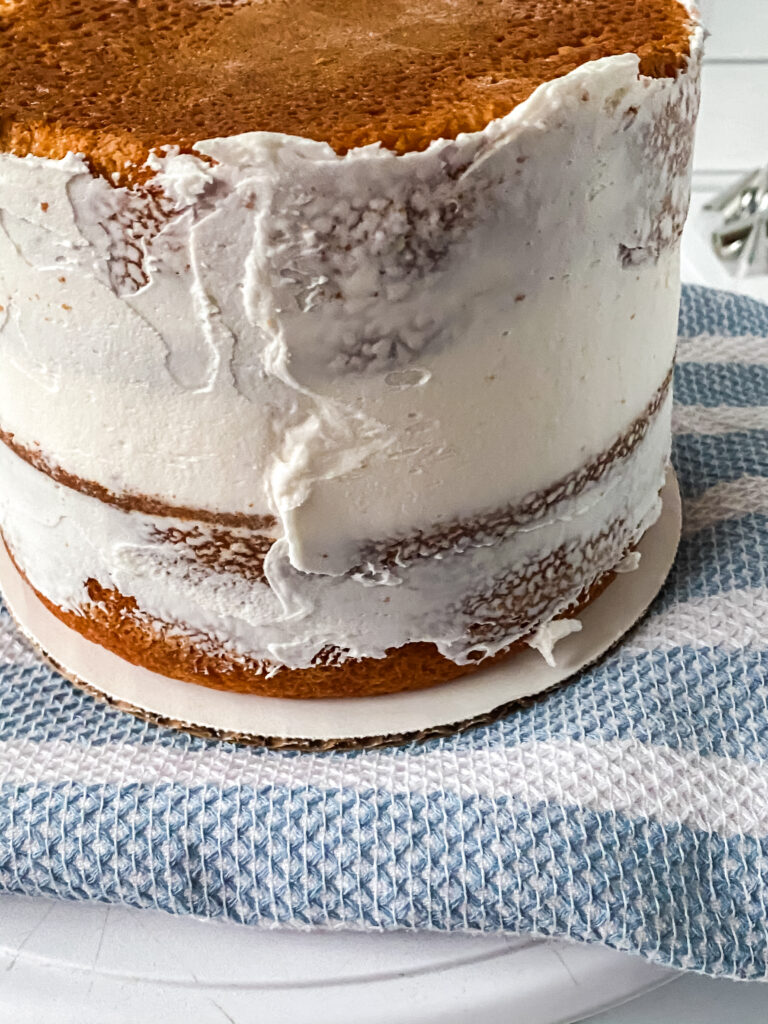
- Place one dollop of buttercream in the center of the cake board. This will serve as “glue” to secure the cake to the board.
- Place your frozen cake layers onto the board. If you haven’t already, assemble the cake layers.
- Once the cake is stacked, apply a light crumb coat (a thin layer of buttercream over the entire cake) to trap any loose crumbs.
- Chill the cake in the fridge or freezer to set the crumb coat while you prepare your icing.
Prepare the Piping Bag

- Fit the coupler into your piping bag, then attach the Tip 47.
- Fill the piping bag halfway with buttercream icing.
- Test the flow of icing by squeezing a small amount out onto parchment paper or a clean surface.
Start Basket Weaving
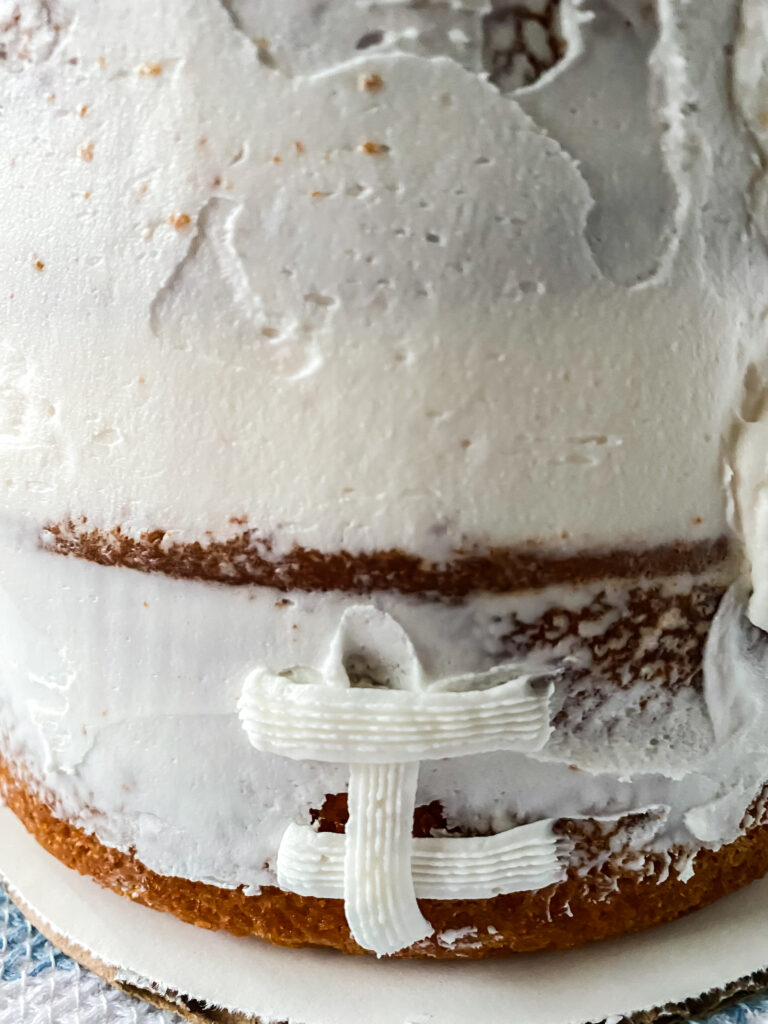
- Place the cake on the turntable at eye level to make the process easier.
- Position your piping bag at a 45-degree angle at the 6 o’clock position (imagine the cake as a clock face).
- Pipe a vertical line of icing, starting from top to bottom. Stop squeezing and gently pull away from the cake.
- Pro Tip: Always remember to squeeze, stop, and pull away for clean lines.
- Next, position your piping bag at 3 o’clock, still at a 45-degree angle. Pipe short horizontal lines of icing, starting from the top of the vertical line you just piped. Ensure the spacing is even between each horizontal line.
- Once you’ve completed the horizontal lines, pipe another vertical line over the end of the horizontal stripes.
- Start the next set of horizontal stripes by burying the tip under the previous vertical line and piping a new set of horizontal lines.
Continue the Pattern
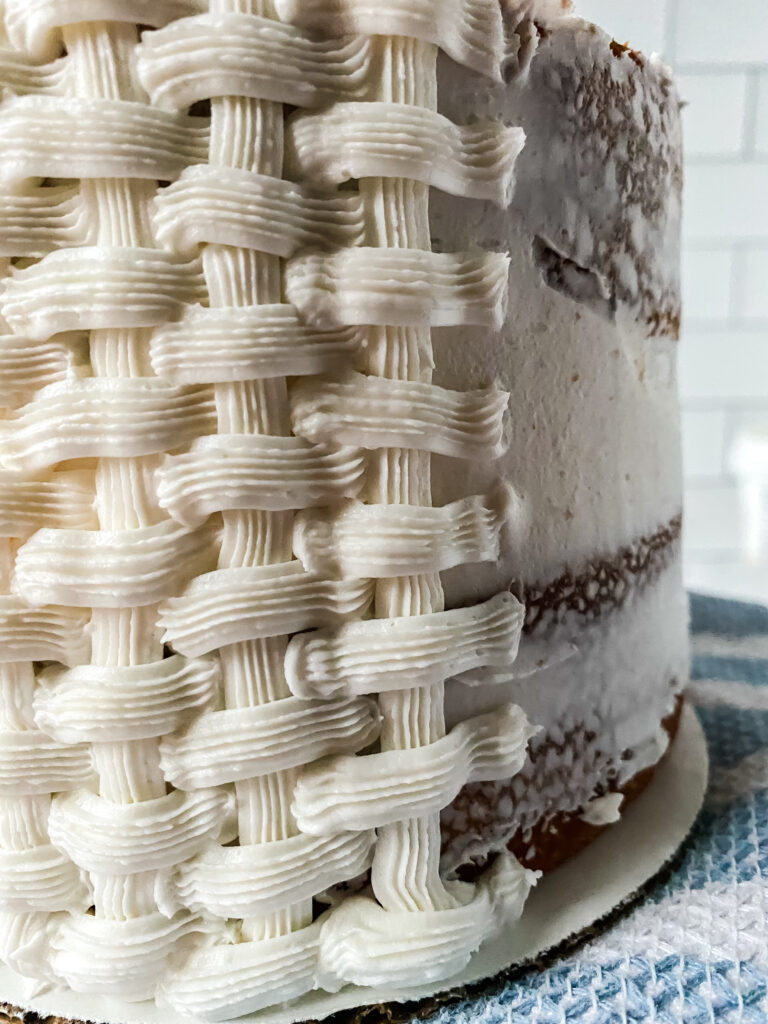
- Repeat the vertical and horizontal lines, working your way around the cake.
- Continue piping until the entire cake is covered with the basket weave pattern.
Final Touches
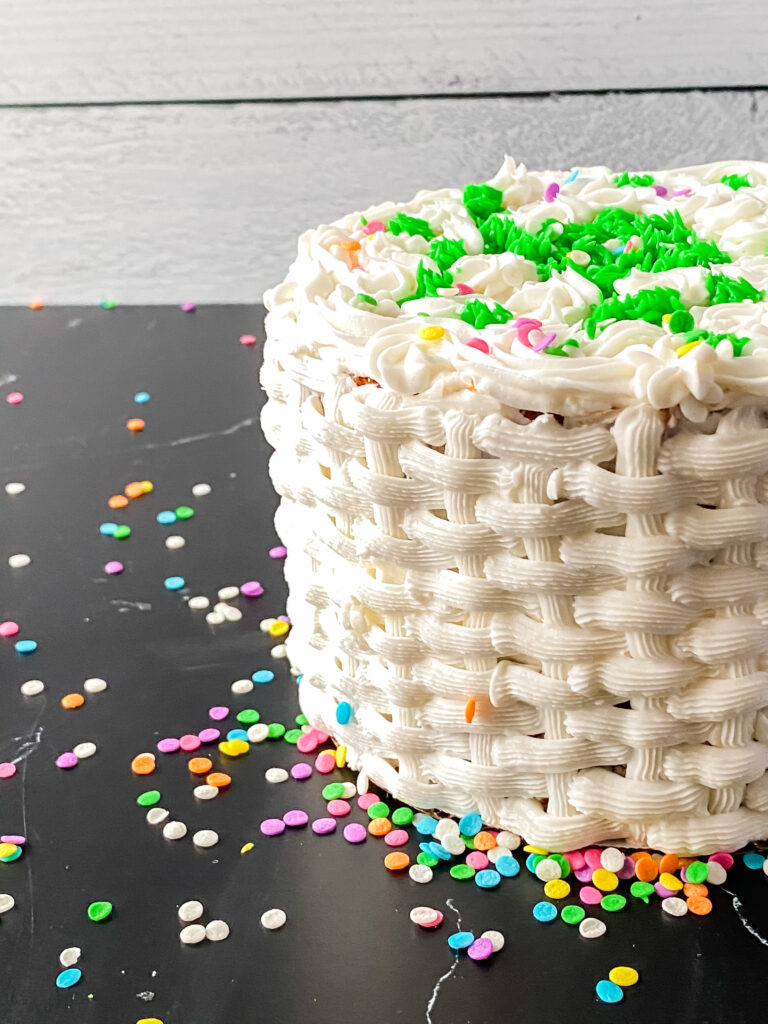
Once you’ve covered the cake in the basketweave design, give it a final look. Adjust any sections that may need more definition or neatness.
Additional Tips:
- One Vertical Line at a Time: Avoid trying to pipe all the vertical lines first. This can lead to a mess, and the icing may set too quickly. Always pipe one vertical line and follow it with horizontal lines.
- Eye-Level Positioning: Using a turntable at eye level will significantly improve your technique, making it easier to apply even pressure and control the design.
- Coloring Icing: If you plan to use colored icing, make sure to make extra to avoid running out midway through. Underestimating the amount needed can cause problems when trying to match the color later.
- Timing: As the cake sets, the icing color may darken slightly, so always make enough icing to finish the project without needing to mix more midway.
This basketweave cake is an elegant and timeless design that adds a sophisticated touch to any celebration. With patience and practice, you can perfect the technique and create a stunning cake that is as beautiful as it is delicious. Whether you’re a seasoned decorator or a beginner, this tutorial provides all the tips and tricks you need to master the basketweave look!
Check Out Our Other Decorating Tutorials
- How to Make a Ninja Turtles Face Cake
- How to make Harry Potter’s birthday cake
- How to Make a Stunning Barbie Dress Cake: Step-by-Step Tutorial
- How to Decorate a Tray (Sheet) Cake
- How to Make a DoNut Grow-Up Cake
- How to Make a Glow in the Dark Cake
- How to make the cartoon SLICE cake
Pin for Later